Key takeaways
- Peel and stick floor tile should acclimate in the room for 48 hours at 18–29 °C (65–85 °F) before installation.
- Dust, moisture and uneven subfloors cause most lifting, so cleaning, leveling and priming matter more than the tile itself.
- Starting from two center lines that cross at 90° keeps rows straight and avoids thin slivers at the walls.
- Rolling the finished floor with a heavy roller activates the pressure-sensitive adhesive and prevents curling edges.
- You can lay peel and stick tile over existing tile only after the grout lines are filled flush and the surface is primed.
To install peel and stick floor tile so it does not lift, acclimate the tiles for 48 hours, clean and level the subfloor, prime porous surfaces, snap centered layout lines, then press each tile down from the center and roll the whole floor with a heavy roller. Most lifting comes from dust, moisture or uneven floors, not weak adhesive.
This guide covers tools, step-by-step tile installation, laying over existing tile or concrete, the common mistakes that cause edges to curl, and typical flooring installation costs. The same method works for peel and stick vinyl flooring in every format: peel and stick vinyl plank flooring, the classic 12x12 peel and stick floor tile and self-adhesive floor film rolls.
What is peel and stick flooring?
Peel and stick flooring is resilient vinyl, usually PVC, with a factory-applied pressure-sensitive adhesive (PSA) on the back covered by a release liner. You peel the liner, position the piece and press it down; no separate tiling adhesive or grout is needed. It comes in three main formats:
| Format | Typical size | Typical thickness | Best for |
|---|---|---|---|
| Self stick floor tiles | 12 × 12 in (305 × 305 mm), also 18 × 18 in | 1.2–2 mm | Kitchens, laundry rooms, checkerboard and marble looks |
| Peel and stick vinyl planks | About 6 × 36 in (152 × 914 mm) | 2–3 mm | Wood-look bedrooms, living rooms, basements |
| Self-adhesive floor film rolls | 0.61 or 1.22 m wide × 10–50 m | 0.25–0.35 mm | Fast refreshes, rentals, retail pop-ups, events |
| Groutable peel and stick tile | 12 × 12 or 12 × 24 in | 2–3 mm | Stone and ceramic looks with real grout joints |
Thicker tiles and planks hide minor subfloor flaws better; thin film rolls show every bump, so they need a smoother, harder surface. For a deeper comparison with click-lock LVP and glue-down, see peel-and-stick vinyl plank vs click-lock LVP vs glue-down.
What tools do you need to install peel and stick tile?
- Tape measure, chalk line and carpenter's square
- Sharp utility knife with spare blades and a straightedge
- Floor scraper, vacuum and lint-free cloth
- Latex or acrylic floor primer suited to self-adhesive vinyl
- Floor patch or leveling compound for dips and grout lines
- Hand roller, or a rented 100 lb (45 kg) floor roller for whole rooms
- Hairdryer or heat gun on low, for cold tiles and edges
- Transition strips for doorways and flooring changes
How to install peel and stick floor tile, step by step
If you are wondering how to install peel and stick tile without help, the answer is that one person can do it. Allow a day for a typical 8 × 10 ft (2.4 × 3 m) kitchen or bathroom floor installation, including prep and a 24-hour primer and patch cure if needed.
- Acclimate the tiles. Keep the boxes flat, opened, in the room for 48 hours at 18–29 °C (65–85 °F). Maintain that temperature during installation and for 48 hours after.
- Remove the old finish if needed. Pull up carpet, loose vinyl and baseboards or quarter-round. Scrape off old adhesive ridges and paint drips.
- Level and repair the subfloor. The floor should be flat within about 3/16 in over 10 ft (5 mm over 3 m). Fill dips, cracks and nail heads with patch, sand high spots and let patch cure fully.
- Clean thoroughly. Vacuum, then wipe with a damp cloth and let dry. Dust is the number one reason peel and stick tiles lift.
- Prime porous surfaces. Plywood, concrete, patch and leveled areas absorb adhesive. One coat of primer seals them and dramatically improves bond. Let it dry to the touch.
- Snap center lines. Find the center of each wall, snap two chalk lines that cross at 90° in the middle of the room, and dry-lay a row each way so cut pieces at the walls are at least half a tile wide.
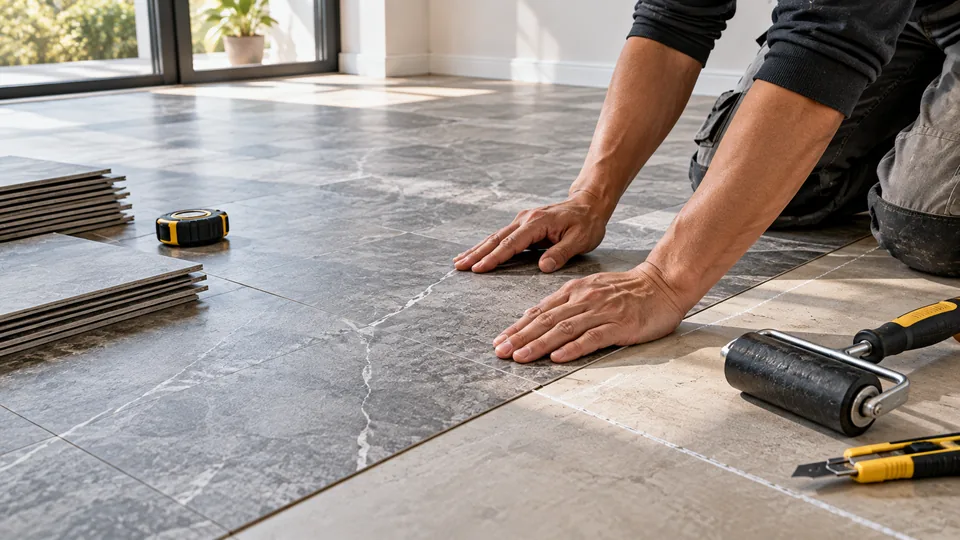
- Lay from the center out. Peel the liner, line the first tile up on the cross, set one edge down and lower the rest. Butt each new tile tightly to its neighbors, working in a pyramid toward the walls. Check arrows on the back for direction.
- Cut perimeter tiles. Lay a loose tile over the last full tile, place another against the wall, mark and score with a utility knife, then snap. Warm tiles slightly for curved cuts around door casings and pipes.
- Roll the floor. Roll the whole floor in two directions with a 100 lb roller, or press every tile with a hand roller. Pressure is what activates PSA.
- Finish and wait. Refit baseboards, add transition strips and avoid wet mopping and heavy furniture for 24–48 hours while the adhesive builds bond.
For self-adhesive vinyl flooring rolls, the process is the same except you unroll a drop along one wall, peel 30 cm of liner, align and squeegee from the center outward, then overlap or butt the next drop and double-cut the seam.
Can you put peel and stick tile over tile?
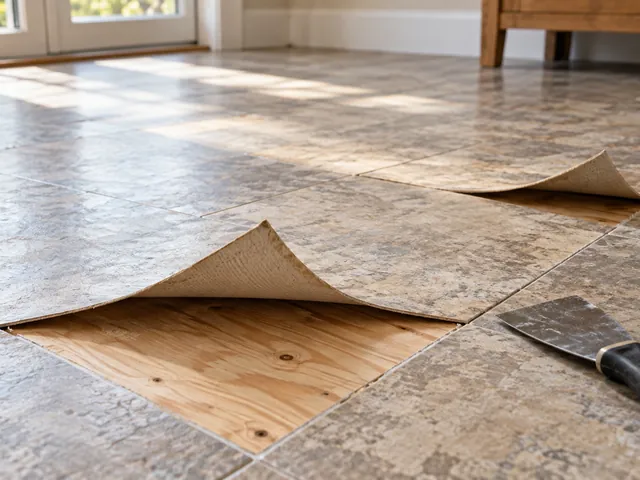
Yes, you can put peel and stick tile over tile if the existing ceramic or vinyl is sound, well bonded and flat. Loose or cracked tiles must be removed or re-glued first. The big issue is the grout lines: thin tiles will telegraph every joint within weeks.
- Ceramic tile: degrease, then fill grout lines flush with a cement-based skim coat or embossing leveler and prime.
- Glossy vinyl or vinyl tiles over vinyl flooring: scuff-sand the glossy surface, clean and prime so the PSA has something to grip.
- Cushioned sheet vinyl: remove it. The soft foam layer lets tiles dent and shift.
The same rules answer the wider question, can you put vinyl flooring over tile, and can you lay vinyl over tiles of any kind: vinyl plank flooring over tile works well when grout joints are filled and the floor is flat. Note that each layer raises floor height, which affects door clearance and transitions.
How to lay peel and stick tile on concrete
Vinyl flooring on concrete is common in basements and garages, but concrete brings moisture. Tape a 60 × 60 cm (2 × 2 ft) sheet of clear plastic to the slab for 24 hours; if condensation appears underneath or the concrete darkens, the slab is too damp for self-adhesive tiles. Use a moisture barrier primer or choose loose lay vinyl tiles instead.
On dry concrete, grind or patch ridges, vacuum thoroughly and prime; bare concrete dust will stop any adhesive bonding. New slabs typically need at least 30 days, often 60–90, to dry before flooring over concrete. Our subfloor preparation guide covers moisture testing in more detail.
Is peel and stick floor tile good for bathrooms and kitchens?
Waterproof peel and stick floor tile works in bathrooms and kitchens because PVC itself does not absorb water, which is why peel and stick floor tile bathroom makeovers are so popular. The weak point is the seams: water mopped across the floor can wick under edges and weaken the adhesive. To protect a bathroom floor installation:
- Butt tiles tightly and roll seams twice.
- Run a bead of clear silicone where the floor meets the tub, shower tray and toilet base.
- Damp-mop rather than flood the floor, and wipe spills quickly.
- Use groutable tiles with a flexible vinyl grout for wet areas where water pools.
Peel and stick kitchen floor tile handles everyday spills well. Place felt pads under chair and table legs, because sharp point loads dent thin vinyl.
Common mistakes when installing vinyl plank flooring and peel and stick tile
Whether you are doing a full vinyl plank flooring installation or a small vinyl floor installation in a laundry room, the same errors cause most callbacks. Good floor flooring installation is mostly careful preparation.
| Mistake | What happens | Fix |
|---|---|---|
| Skipping primer on wood or concrete | Tiles lift within weeks | Prime porous surfaces and let dry |
| Installing in a cold room | Adhesive never fully wets out | Keep room above 18 °C (65 °F) before, during and after |
| Not rolling | Weak bond, curling corners | Roll in two directions with a heavy roller |
| Starting at a wall | Crooked rows and thin slivers at the far wall | Start from center lines |
| Laying over grout lines or embossed vinyl | Pattern shows through | Fill with skim coat or leveler first |
| Stretching tiles to close gaps | Tiles shrink back and gaps open | Butt edges, never pull |
If edges have already lifted, our vinyl and peel-and-stick floor repair guide explains re-bonding with heat and adhesive.
Which transition strips for vinyl flooring should you use?
Transition strips for flooring hide the cut edge where your new vinyl meets another floor and stop toes and vacuum heads catching on it.
- Flat vinyl transition strips join two floors at the same height, such as vinyl to vinyl transition strips between rooms.
- Reducers step down from thicker flooring such as hardwood or tile.
- T-moldings cover a gap between two floors at equal height.
- A vinyl threshold or end cap finishes edges at sliding doors and exterior thresholds.
How much does it cost to install vinyl flooring?
DIY peel and stick tile installation costs only materials and tools, typically the lowest-cost flooring option per square foot. Professional flooring installation rates vary widely by region and prep work. In many US markets, labor for luxury vinyl plank installation is typically a few dollars per square foot, and floor leveling, removal of old flooring, stairs and transitions add to the total. Peel and stick flooring usually costs less to install than click-lock LVP because it needs less underlayment and trim work.
When comparing flooring and installation prices, ask whether the quote includes subfloor prep, primer, baseboard removal and disposal. Prep often decides the final number more than the flooring itself.
For retailers, contractors and event installers
We manufacture self-adhesive PVC floor film and tiles in wood grain, stone, concrete, marble, checkerboard and hexagon patterns. Our peel-and-stick PVC vinyl floor tile is 0.3 mm thick with an embossed, skid-resistant surface in 0.61 m or 1.22 m × 50 m rolls, from 1 roll. Custom patterns, private-label packaging and cut sizes start at 100 rolls with a 15–25 day lead time. The retail pop-up flooring case study shows how roll formats speed up temporary fit-outs.
Next step
Send us the pattern, format (tiles or rolls), thickness and quantity you need, plus the floor type you install over. We provide free A4 samples so you can test adhesion on your own subfloor, and quote within 24 hours. Request samples or a quotation.
Frequently Asked Questions
Do peel and stick floor tiles really stay down?
Peel and stick floor tiles stay down for years when they are installed on a clean, flat, primed and dry subfloor and rolled with firm pressure. They lift when laid over dust, bare concrete, damp slabs, cold rooms or grout lines. Most failures are preparation problems rather than adhesive problems, so preparation time pays off directly.
Can you put peel and stick tile over tile?
You can put peel and stick tile over existing ceramic or vinyl tile if it is firmly bonded, flat and clean. Fill the grout lines flush with a skim coat or embossing leveler, let it cure, then prime the whole surface. Without filling the joints, the grout pattern will show through thin vinyl within a few weeks.
Do you need primer for peel and stick floor tile?
Primer is strongly recommended on any porous surface, including plywood, particleboard, concrete and floor patch. It seals the surface so the pressure-sensitive adhesive bonds to a consistent film instead of soaking into dusty material. On sound, well-cleaned existing vinyl or glazed tile, a light scuff-sand and primer still improves grip.
Can you install peel and stick tile on concrete?
Yes, on dry, smooth, primed concrete. Test moisture first by taping clear plastic to the slab for 24 hours; condensation or darkening means the slab is too damp for self-adhesive tiles. New concrete usually needs at least 30 days, often 60 to 90, to dry before you install vinyl flooring on it.
Is peel and stick floor tile waterproof for bathrooms?
The PVC tile itself is waterproof, so it works in bathrooms, but water can seep through seams and weaken the adhesive. Butt tiles tightly, roll the seams, seal edges at the tub, shower and toilet with clear silicone, and damp-mop instead of flooding the floor. Groutable tiles give extra protection in wet areas.
Should you leave a gap when installing peel and stick tile?
Peel and stick tiles are butted tightly together with no gap between pieces, because they are glued down and do not float. A small gap of about 1/8 inch at the walls, hidden by baseboard, allows for slight movement. Never stretch tiles to close a gap, because they shrink back and the seam opens later.
How much does it cost to install vinyl plank flooring?
DIY peel and stick installation costs only materials and basic tools. Professional luxury vinyl plank installation labor is typically a few dollars per square foot in many US markets, with extra charges for removing old flooring, leveling, stairs and transitions. Always check whether a quote includes subfloor preparation, which often changes the total most.
How long does peel and stick flooring last?
Good-quality peel and stick flooring typically lasts 5 to 10 years or more in homes when it is installed on a properly prepared subfloor and protected with felt pads under furniture. Lifespan depends mostly on the wear layer, foot traffic and moisture. Thin floor film rolls suit shorter-term uses such as rentals, retail displays and events.