Key takeaways
- Most resilient flooring makers ask for a subfloor flat to within about 5 mm over 3 m (3/16 in over 10 ft), with no bump or dip sharper than about 1 mm over 30 cm.
- Self-leveling compound is a cement-based underlayment poured 3–10 mm thick in a typical single pass, and it must go over a primed, clean surface to bond.
- Thin peel-and-stick vinyl of 0.25–0.3 mm telegraphs every grain of grit, nail head and grout line, so smooth preparation matters more than with thick plank flooring.
- New concrete slabs usually need at least 28 days to cure, and any floor should pass a moisture test before vinyl or vinyl floor adhesive goes down.
- Porous or dusty subfloors such as fresh leveling compound, plywood and bare concrete need a floor primer so pressure-sensitive adhesive can grip rather than soak in.
Self leveling concrete, more accurately called self-leveling compound or underlayment, is a pourable cement mix that flows out to create a flat, smooth surface over a concrete or prepared wood subfloor. It is the standard fix when a floor is too uneven for peel-and-stick or glue-down vinyl, which will otherwise show every dip, ridge and crack within weeks.
This guide covers what each subfloor needs, how flat is flat enough, how to use a floor leveling compound step by step, and which vinyl floor adhesive or primer to pair with it. It is written for DIYers and for installers and retailers who want fewer callbacks from lifting or bubbling tiles.
Why does subfloor preparation matter so much for peel-and-stick flooring?
Peel-and-stick vinyl relies on a pressure-sensitive adhesive (PSA): a permanently tacky layer that bonds when you press it, without water or solvent evaporating. PSA bonds by intimate contact, so anything that reduces contact area, such as dust, a ridge or a hollow, reduces holding power. A flexible tile also drapes over every bump like a sheet over furniture.
Self-adhesive PVC floor film is thin. Our peel-and-stick PVC vinyl floor tile and roll products are 0.25–0.3 mm thick, which keeps them light and easy to cut but means a grain of sand, a nail head or a grout line will show through. Thick rigid-core plank hides more; thin sheet vinyl hides almost nothing.
The four goals of preparation are therefore the same for every floor: flat, smooth, clean and dry, plus sound (no movement or flexing).
What subfloors can you put peel-and-stick flooring on?
| Subfloor | Suitable? | Typical preparation |
|---|---|---|
| Concrete slab | Yes, if dry and cured | Moisture test, grind ridges, fill cracks, level, prime |
| Plywood or OSB | Yes, with underlayment | Re-screw squeaks, fill joints, add 6 mm (1/4 in) underlayment ply or a compound for wood subfloors |
| Existing sheet vinyl or linoleum | Often, if single layer and well bonded | Degloss, repair tears, skim embossing with patch compound |
| Ceramic or porcelain tile | Yes, if flat and sound | Replace loose tiles, fill grout lines flush, prime |
| Hardwood or laminate | Rarely recommended | Better to remove; laminate floats and moves |
| Carpet, cushioned vinyl, painted floors with flaking paint | No | Remove to a solid base |
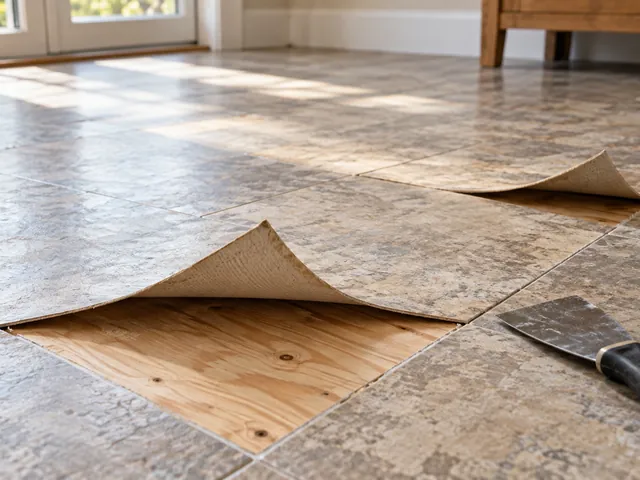
Never lay over more than one layer of old resilient flooring, and never over a floor that flexes underfoot. If you are taking up an old floor first, our guide on how to remove peel-and-stick floor tiles and old vinyl covers adhesive residue.
How flat does a floor need to be for vinyl?
Most resilient flooring guidelines call for a subfloor flat within about 5 mm over 3 m (3/16 in over 10 ft), and without abrupt changes greater than about 1 mm over 30 cm (1/32 in over 12 in). Check with a 2–3 m straightedge or a long level in several directions and mark high spots and low spots with a crayon.
- High spots on concrete: grind with a cup wheel or rub down with a masonry stone.
- Low spots and cracks up to a few millimeters: trowel-applied patch or skim compound.
- Wide dips, slopes or a rough slab: pour a self leveling floor compound over the whole area.
What is self leveling concrete and when do you need it?
Self-leveling compound, also sold as self leveling cement, concrete floor leveler, cement floor leveler, concrete leveling compound or floor leveling compound, is a blend of Portland or calcium-aluminate cement, fine sand, polymers and flow agents. Mixed with the right amount of water it behaves like a thick liquid, finds its own level and cures to a hard, smooth surface that resilient flooring can bond to. A concrete self leveling compound arrives as a dry powder; the self leveling concrete mix is made on site by adding a measured amount of water.
The top rated self leveling compound for a job is the one whose thickness range, drying time and substrate list match your floor, not the one with the fastest set. A self leveling compound for tile installations is often rated for thicker pours and quicker tiling; a self leveling concrete underlayment for resilient flooring prioritizes a very smooth finish.
| Product | What it is for | Typical thickness |
|---|---|---|
| Self leveling underlayment | Flattening whole rooms indoors before flooring | 3–10 mm (1/8–3/8 in) per pass; some grades thicker |
| Patch or skim compound | Cracks, holes, grout lines, embossing, feathering edges | Feather edge to about 6 mm (1/4 in) |
| Fiber-reinforced leveler | Leveling compound for wood subfloors that flex slightly | Usually 6 mm (1/4 in) minimum over wood |
| Exterior concrete leveler / resurfacer | Outdoor slabs, patios, steps | Varies; not a flooring underlayment |
Self-leveling compound is not a structural repair. It will not fix a cracked, moving slab or a bouncy joist, and an outdoor self leveling concrete product is formulated for weather and is not the same as an indoor underlayment. For self leveling concrete exterior jobs such as patios, a concrete resurfacer or exterior concrete leveler is the right category.
How do you level a floor with leveling compound?
Leveling a floor with leveling compound is mostly about preparation and speed. Many mixes give only 10–20 minutes of working time, so have everything ready before you add water.
- Clean to bare, sound substrate. Scrape off paint, glue and loose material, then vacuum thoroughly. Grease, curing compounds and sealers stop bonding.
- Seal the edges and gaps. Fill cracks and holes, block drains and doorways with foam strips or timber dams, and seal gaps at walls so the liquid cannot run under baseboards.
- Prime the floor. Roll on the primer specified for the compound, usually one or two coats, and let it dry to a film. Primer stops the slab sucking water out of the mix and prevents pinholes.
- Mix to the exact water ratio. Use a drill and paddle at low speed for 2–3 minutes. Too much water weakens the surface and causes dusting.
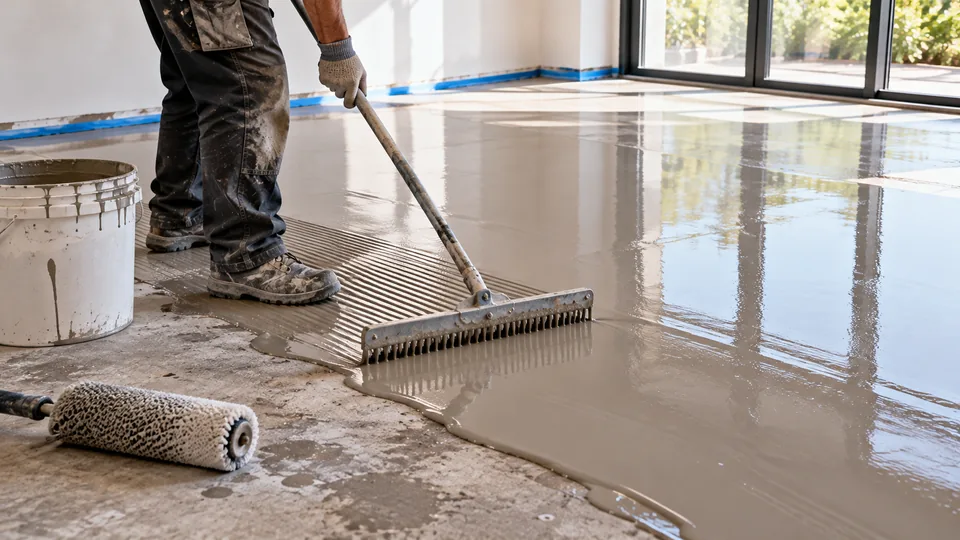
- Pour and spread. Pour in ribbons starting at the farthest point, spread with a gauge rake or smoother, and keep a wet edge between batches.
- Remove air. Run a spiked roller through the wet compound to release bubbles.
- Cure, then check. Most compounds are walkable in 2–6 hours at about 20 °C (68 °F). Allow the drying time stated before laying vinyl, often 24 hours for thin pours and longer for thick ones, then prime again if the flooring calls for it.
Concrete surface preparation: moisture, cracks and coatings
Moisture is the main reason vinyl lifts on concrete. Water vapor rising through a slab collects under an impermeable vinyl layer, softens the adhesive and can cause odor or mold.
- Cure time. New slabs typically need at least 28 days, and thick or basement slabs much longer.
- Quick test. Tape a 45 × 45 cm (18 × 18 in) sheet of clear plastic to the floor for 24 hours. Condensation underneath or a darkened slab means too much moisture.
- Professional tests. In-slab relative humidity probes or calcium chloride kits give numbers to compare with the flooring maker's limit.
- Cracks. Hairline shrinkage cracks can be filled with patch compound; moving or widening cracks need structural advice.
Epoxy coatings for concrete floors, sometimes searched as epoxy cement floor or cement epoxy coating, are common in garages and basements. Peel-and-stick vinyl can bond to a well-adhered epoxy finish if it is clean, scuffed and degreased, but not to flaking paint. If you are coating instead, garage floor prep for epoxy follows the same idea: grind or acid-etch to open the surface, then remove all dust. In basements and other damp rooms, a moisture-mitigation primer under the leveler is often required.
How do you prepare a wood subfloor for vinyl?
Plywood and OSB move with humidity and flex under load, and both have joints, knots and nail heads that telegraph through thin vinyl.
- Drive or replace protruding nails and add screws every 15 cm (6 in) at joists to stop squeaks.
- Over boards or rough planks, install 6 mm (1/4 in) underlayment-grade plywood, fixed every 10–15 cm (4–6 in) with staggered joints.
- Fill joints and fastener heads with a flexible patch compound and sand smooth.
- If you prefer to pour, use a self leveling floor compound for wood floors that is fiber-reinforced or used over metal lath, at the minimum thickness the maker states.
Can you lay vinyl over old tile or linoleum?
Yes, if the old floor is flat, firmly bonded and a single layer. The work is in removing texture.
- Ceramic tile: replace loose or broken tiles. A tile patch kit or floor tile repair epoxy fixes small chips; epoxy for cracked tile works only if the tile is still well bonded. Then skim the grout lines flush with patch compound, because they will show through thin vinyl.
- Old vinyl or lino: strip wax, degloss with a scuff pad, and glue down any lifting edges. A vinyl floor patch kit or linoleum patch kit handles small tears; for how to patch vinyl flooring in larger areas, cut out the damaged section and inlay a matching piece.
- Embossed patterns: fill with an embossing leveler or skim coat so the texture does not print through.
Which vinyl floor adhesive or primer should you use?
Peel-and-stick tiles carry their own pressure sensitive vinyl adhesive, but the subfloor still decides how well it grips. Porous, dusty surfaces such as fresh leveling compound, bare concrete and plywood absorb tack, so a floor primer for vinyl tile is often the difference between a floor that stays down and one that lifts at the seams.
| Adhesive or primer | Used with | Notes |
|---|---|---|
| Floor primer (acrylic) | Peel-and-stick tiles and rolls on porous subfloors | Seals dust, improves PSA tack; let it dry fully |
| Pressure sensitive floor glue | Vinyl plank flooring adhesive, LVP flooring adhesive, LVT flooring glue down | Trowel on, wait until tacky, then lay; allows repositioning |
| Vinyl sheet flooring adhesive | Sheet vinyl; also sold as lino flooring adhesive or linoleum flooring glue for full-spread installs | Wet-set acrylic; follow trowel notch size |
| Vinyl composition tile adhesive | VCT in commercial spaces | Clear-thin spread; usually not for luxury vinyl |
| Wood flooring glue adhesive | Engineered wood; laminate flooring adhesive for glued joints | Not a substitute for vinyl flooring glue adhesive |
For high-traffic edges, doorways and kitchens, some installers add a thin coat of vinyl tile adhesive or double-sided flooring tape under peel-and-stick tiles. The chemistry of these glues is covered in our article on pressure-sensitive adhesive explained.
Prep checklist for installers and retailers
If you sell or install self-adhesive flooring, most complaints trace back to preparation rather than the product. A short checklist printed on packaging or on your product page reduces returns:
- Flat within 5 mm over 3 m; grout lines and joints filled flush.
- Moisture tested; concrete cured at least 28 days.
- Vacuumed, then wiped with a damp cloth and allowed to dry.
- Primed if porous; room and tiles at about 18–29 °C (65–85 °F) for 24–48 hours before and after installation.
- Rolled with a 45 kg (100 lb) floor roller or pressed firmly with a hand roller.
Our self-adhesive PVC flooring ships in 0.61 m and 1.22 m widths on 50 m rolls, in wood, stone, concrete and checkerboard designs, from 1 roll for stock items. See the full range of self-adhesive wallpaper and floor films, and our step-by-step guide on how to install peel-and-stick floor tiles.
Next step
Tell us the subfloor type, the room and traffic level, and your design and roll quantity, and we will suggest a suitable thickness and format. Free A4 samples let you test adhesion on your own primed subfloor first. Request samples or a quotation through our contact page.
Frequently Asked Questions
Do you need to prime a floor before self-leveling compound?
Yes. Almost every self-leveling compound requires a primer on concrete, wood and old tile. Primer seals the porous surface so it does not pull water out of the mix, improves bonding and prevents pinholes and bubbles. Apply the primer the compound maker specifies and let it dry to a clear film before pouring.
How thick can self leveling concrete be poured?
Typical indoor self leveling underlayment is poured about 3 to 10 millimeters (1/8 to 3/8 inch) thick in one pass, with some grades rated for deeper fills or for feathering to zero at the edges. Check the bag for minimum and maximum thickness, especially over wood subfloors, where a thicker minimum layer is usually required.
Can you put peel and stick tiles on concrete?
Yes, peel-and-stick tiles can go on concrete that is fully cured, dry, flat and clean. Test for moisture first, grind or fill uneven areas, vacuum away all dust and apply a floor primer to seal the porous surface. Without primer, concrete dust weakens the pressure-sensitive adhesive and tiles tend to lift.
What is the best floor leveling compound for wood subfloors?
Use a fiber-reinforced self-leveling compound labeled for wood subfloors, or a standard compound over metal lath, applied at the minimum thickness the maker specifies, often about 6 millimeters. The wood must be firmly screwed down and primed first. For small dips, a trowel-applied flexible patch compound is easier and cheaper.
What adhesive do you use for vinyl tile?
Peel-and-stick vinyl tiles already have a pressure-sensitive adhesive, so they usually need only a primer on porous subfloors. Dry-back vinyl tile and plank use a pressure sensitive floor glue troweled on and left until tacky. Sheet vinyl uses a wet-set acrylic sheet flooring adhesive, linoleum flooring adhesive or lino flooring glue is a separate type, and VCT uses its own clear-thin adhesive.
Can you lay vinyl flooring over ceramic tile?
You can lay vinyl over ceramic tile if the tiles are flat, sound and firmly bonded. Replace loose or cracked tiles, then fill the grout lines flush with a patch or skim compound so they do not show through. Clean, degloss and prime the surface before installing peel-and-stick or glue-down vinyl.
How long after self-leveling compound can you lay flooring?
Most self-leveling compounds are walkable within 2 to 6 hours at room temperature, but resilient flooring usually needs the compound to dry longer, often around 24 hours for thin pours and several days for thick ones. Cool, humid rooms slow drying. Always follow the compound maker's stated time before installing vinyl.