Key takeaways
- Most lifting peel-and-stick tiles can be re-bonded by warming them, cleaning the subfloor and adding a thin layer of flooring adhesive.
- Gaps between vinyl tiles usually come from installing cold tiles that shrink; acclimatize tiles at 18–27 °C for 24–48 hours first.
- A double-cut patch, cutting the offcut and damaged area together, gives an almost invisible repair for large tears in sheet vinyl.
- Vinyl, LVP, linoleum and ceramic tile each need a different repair kit, because fillers are formulated for specific materials.
- Peel-and-stick vinyl can cover flat, well-bonded ceramic tile once grout lines are leveled, avoiding the cost of tearing it out.
How to fix vinyl flooring depends on the damage: re-glue lifting edges with heat and vinyl floor adhesive, fill small gaps and chips with a color-matched vinyl floor repair kit, patch tears with a double-cut inlay, and replace badly damaged peel-and-stick tiles or planks. Most of these repairs take under an hour and need no specialist tools.
Whether you are repairing a vinyl floor in a kitchen, a bathroom or a rental unit, the principle is the same: fix the cause, then the surface. This guide covers the common faults on peel-and-stick tiles, sheet vinyl, linoleum and LVP, which repair kit to buy for each, and what to do about cracked ceramic tile, including when covering it is smarter than tearing it out.
What causes vinyl and peel-and-stick floor damage?
Almost every failure traces back to one of four things: an unsuitable subfloor, moisture, temperature swings or point loads such as furniture legs. Fixing the symptom without the cause usually means repeating the repair within months.
| Problem | Usual cause | Repair | Time |
|---|---|---|---|
| Lifting corners or edges | Dusty or porous subfloor, no primer, cold install | Warm, re-glue, roll and weight | 15–30 min per tile |
| Gaps between tiles | Shrinkage after install, film not acclimatized | Re-seat, or fill with seam filler | 30–60 min |
| Bubbles in sheet vinyl | Trapped air or moisture vapor | Slit, inject adhesive, flatten | 20 min |
| Tears, cuts and gouges | Dragged appliances, sharp objects | Seam sealer for small cuts; inlay patch for large | 30–90 min |
| Chips and dents in LVP | Dropped objects, chair legs | Hard wax or putty from an LVP repair kit | 10–20 min |
| Whole tile or plank damaged | Burns, deep cuts, water damage | Replace the unit | 30–60 min |
How to fix vinyl flooring that is lifting or loose
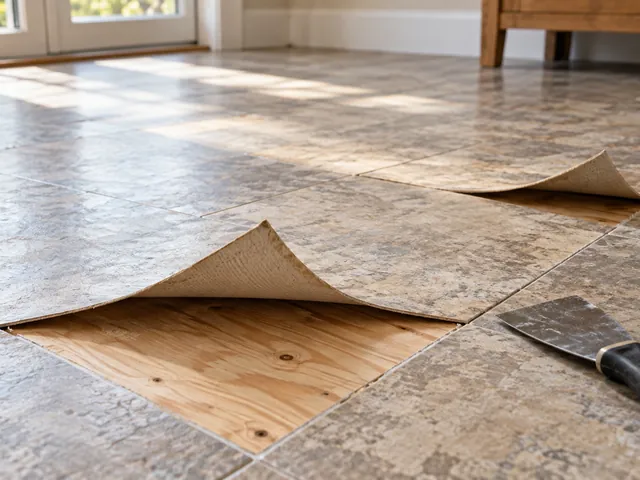
Loose tile repair is the most common job on peel-and-stick floors. The pressure-sensitive adhesive (PSA) on the back of the tile is still usable; it simply lost contact with the floor. Warmth softens both the vinyl and the adhesive so they can bond again.
- Warm the tile. Use a hairdryer or heat gun on low, held 10–15 cm (4–6 in) away, until the vinyl is flexible, roughly 50–60 °C (120–140 °F) on the surface. Do not scorch it.
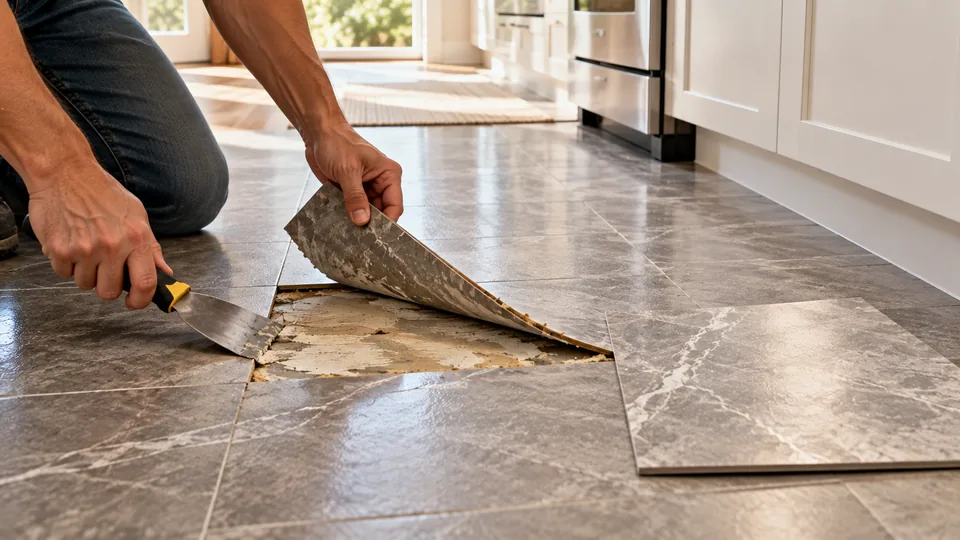
- Lift the loose area. Ease it up with a putty knife just far enough to reach underneath. Stop before the tile creases.
- Clean the subfloor. Vacuum dust and grit, then wipe with a barely damp cloth and let it dry fully. Dust is the main reason peel-and-stick tiles lift.
- Apply adhesive. Spread a thin layer of vinyl floor repair glue, a flooring-grade acrylic or contact adhesive, on the subfloor. Keep it 5 mm (0.2 in) back from the edge to avoid squeeze-out.
- Press and roll. Lay the tile down and roll it firmly with a J-roller or rolling pin, working from the center outward.
- Weight it overnight. Put heavy books or a toolbox on a board over the repair for 12–24 hours, then wipe off any adhesive with the solvent the glue maker recommends.
If several tiles lift at once, the subfloor is the real problem. Our guide to subfloor preparation for peel-and-stick flooring explains priming, moisture testing and flatness tolerances.
How do you fix gaps between peel-and-stick tiles?
Gaps of 1–2 mm (about 1/16 in) usually appear when tiles were laid straight from a cold store or car and then shrank as they warmed. For a fresh install, warm the tiles, lift them and slide them together. On older floors where the adhesive has fully set, fill the joint with a color-matched seam filler or flexible vinyl putty, then wipe it flush.
To prevent it next time, let tiles acclimatize in the room at 18–27 °C (65–80 °F) for 24–48 hours and keep the room in that range during and for two days after installation. See how to install peel-and-stick floor tiles so they do not lift for the full method.
How do you repair a tear in vinyl flooring or linoleum?
If you are searching for how to repair torn vinyl flooring, start by checking whether any material is missing. Small cuts under 5 cm (2 in) in sheet vinyl can be closed with a liquid seam sealer: clean the cut, press the edges together, run a thin bead along it and keep traffic off for a few hours. This is the quickest way to fix torn vinyl flooring when no material is missing.
For a larger rip, a hole or a burn, use a double-cut patch:
- Take a spare offcut or cut a piece from inside a closet or under an appliance, matching the pattern.
- Tape the patch over the damage with the pattern aligned exactly.
- Cut through both layers at once with a sharp blade and a straightedge, following grout lines or pattern edges where possible.
- Remove the damaged piece, scrape and clean the floor, glue in the patch and seal the seams.
Linoleum repair follows the same idea but linoleum is a natural material (linseed oil, wood flour and jute), so use a linoleum repair kit with matching wax or color filler rather than vinyl seam sealer. The same double-cut method also works when you need to fix torn linoleum or repair linoleum flooring around a dishwasher.
How do you fix bubbles in sheet vinyl?
A bubble means air or moisture vapor is trapped between the vinyl and the subfloor. Warm the bubble, slit it along a pattern line with a sharp blade, and press out the air. Inject a little vinyl floor repair glue through the slit with a glue syringe, roll it flat and weight it overnight. If bubbles keep forming on a concrete slab, test the slab for moisture before you repair the vinyl floor again.
How do you replace a damaged peel-and-stick tile or vinyl plank?
When a tile is burned, deeply gouged or water-damaged, replacement is faster and neater than any patch. Warm the tile, cut an X through the center with a utility knife, and lift it out from the middle to protect the neighboring edges. Scrape off old adhesive, prime if the floor is porous, and stick in a new tile from the same batch.
For vinyl plank flooring repair, glue-down and peel-and-stick planks come out the same way. Click-lock LVP floor repair is different: you either disassemble from the nearest wall or cut out the plank and glue a new one in with its locking lip trimmed off. Our peel-and-stick PVC vinyl floor tile is 0.3 mm thick with an embossed, skid-resistant surface, which makes swapping a single unit straightforward.
Which vinyl floor repair kit do you need?
The best vinyl floor repair kit is the one designed for your floor's material and the size of the damage. Kits are inexpensive, but the wrong type will not bond or match.
| Kit | What is inside | Best for |
|---|---|---|
| Vinyl floor repair kit / vinyl tile repair kit | Tinted filler compounds, mixing tools, seam sealer | Small holes, cuts and gaps in sheet vinyl and tiles |
| LVP flooring repair kit / vinyl plank floor repair kit | Colored hard-wax sticks, melter, leveling tool, marker pens | Chips, dents and scratches in rigid planks |
| Linoleum repair kit / linoleum flooring repair kit | Colored wax or resin fillers, scraper | Gouges and burns in genuine linoleum |
| Tile chip repair kit / tile crack repair kit | Two-part epoxy or acrylic filler, tint, applicator | Chips and hairline cracks in ceramic and porcelain |
| Vinyl floor repair glue | Flooring adhesive or seam adhesive | Lifting tiles, edges and bubbles |
Before buying, test the color on a spare piece. Fillers usually dry slightly darker, so blend a shade lighter than the floor.
Cracked tile repair: how do you fix cracks in tile floors and showers?
Ceramic tile repair is a different job from vinyl repair because the tile is rigid and set in mortar. For hairline cracks and chips, a tile crack filler or tile chip repair kit is enough: clean the crack, fill with tinted epoxy, level it with a razor and let it cure for 24 hours. This is how most people repair chips in ceramic floor tiles without lifting anything, and a floor tile repair kit costs far less than a callout. The same damaged tile repair method works on walls, so you can fix bathroom tile chips around a basin the same way.
How do you replace a cracked floor tile?
Broken tile repair calls for replacement when the tile is cracked right through, rocks underfoot or has a hollow sound. This is how to fix a broken tile:
- Remove the grout around it with a grout saw or oscillating tool.
- Score an X across the tile, then break it out from the center with a hammer and chisel while wearing eye protection.
- Scrape the old thinset flat, butter the new tile with fresh thinset and press it level with its neighbors.
- Grout after 24 hours and seal the grout once cured.
Fixing floor tiles this way leaves the surrounding tiles undisturbed as long as you work from the center of the broken one outward. Shower tile repair needs extra care: a cracked shower tile can let water reach the backer board, so replace it rather than fill it, and reseal every joint. If the crack keeps returning, the floor underneath is flexing and needs a professional look.
Repair, cover or tear out: what makes sense?
The cost to tear out tile is often higher than people expect, because removal, disposal and subfloor repair are all labor-heavy and are usually priced per square foot on top of the new floor. When the old surface is sound but dated or has a few cracked tiles, many homeowners and landlords cover it instead.
Peel-and-stick vinyl can go over flat, well-bonded ceramic tile once the grout lines are skim-coated level and primed. It will not fix a floor that is loose or uneven, so repair broken tiles first. For rental turnovers, keeping a box of spare tiles from the original batch makes later repairs invisible; our rental apartment turnover project shows how property managers plan for this.
Next step
If you stock or install peel-and-stick flooring, send us the pattern, thickness, roll or tile format and quantity you need, and we will quote within 24 hours. Free A4 samples are available for color matching and adhesion tests on your own subfloor; request them here.
Frequently Asked Questions
How do you fix vinyl flooring that is peeling up?
Warm the peeling area with a hairdryer until the vinyl is flexible, lift it gently, vacuum and clean the subfloor, then apply a thin layer of flooring adhesive. Press the vinyl down, roll it from the center outward and weight it for 12–24 hours. If many tiles peel, prime or repair the subfloor.
What is the best vinyl floor repair kit?
The best vinyl floor repair kit matches your floor type. Sheet vinyl and peel-and-stick tiles need tinted filler compounds and seam sealer. Rigid LVP needs a hard-wax kit with a melter. Genuine linoleum needs a linoleum wax kit. Always test the color on an offcut first, because fillers often dry slightly darker.
How do you repair a tear in vinyl flooring?
For a clean cut under about 5 cm, press the edges together and run liquid seam sealer along it. For a larger tear or hole, tape a matching offcut over the damage, cut through both layers at once, remove the damaged piece, glue in the patch and seal the seams so it sits flush.
Can you replace one peel-and-stick tile?
Yes. Warm the damaged tile with a hairdryer, cut an X through its center and lift it out from the middle so neighboring edges are not disturbed. Scrape off the old adhesive, clean and prime the subfloor if needed, then press in a new tile from the same production batch and roll it firmly.
How do you fix a cracked floor tile without replacing it?
Clean the crack, then fill it with a two-part epoxy tile crack filler tinted to match the glaze. Level the filler with a razor blade, let it cure for about 24 hours and polish lightly. This hides hairline cracks and small chips, but a tile that moves or is broken through should be replaced.
What glue do you use to repair vinyl flooring?
Use a flooring-grade vinyl adhesive, either a pressure-sensitive acrylic or a contact adhesive, for lifting tiles and edges. Use a seam sealer for cuts and joins in sheet vinyl. Avoid general-purpose superglue or construction adhesive, which can stain the vinyl, set too hard and make future repairs difficult.
Is it cheaper to cover old tile than tear it out?
Usually, yes. Tearing out tile involves labor, disposal and often subfloor repair before the new floor goes down. If the existing tile is flat and firmly bonded, skim-coating the grout lines and applying peel-and-stick vinyl over it is typically faster and cheaper, though broken or loose tiles must be fixed first.