Key takeaways
- A 3 m run of peel and stick backsplash, about 1.5–2 square meters, typically takes one person two to four hours to install.
- Degreasing the wall is the single most important step, because cooking oil is the main cause of peel and stick tiles lifting.
- Peel and stick backsplash can go over existing tile only if the tile is flat, firmly bonded and the grout lines are leveled for thin film.
- Standard vinyl backsplash should be kept away from direct gas flame; heat-resistant foil or metal grades suit the cooking zone better.
- Order 10–15% extra material and test a sample on your own wall before installing a full kitchen.
A peel and stick backsplash installs in one afternoon: degrease and dry the wall, mark a level starting line, then press each tile or sheet from the bottom center outward, overlapping seams as the product requires. Trim around outlets with a sharp blade, finish exposed edges with backsplash trim, and keep the film away from open burners.
A typical 3 m (10 ft) run of kitchen backsplash, about 1.5–2 m² (16–22 sq ft), takes two to four hours for one person. It is one of the most popular DIY peel and stick backsplash projects because it is an easy to apply backsplash that needs no tile saw. Below are the product types, tools, step-by-step method, and answers to the questions people ask most: does it work over tile, behind the stove, and how long does it last?
What is a peel and stick backsplash?
A peel and stick backsplash (also sold as a stick on backsplash or peel and stick tile backsplash) is a wall covering with a factory-applied pressure-sensitive adhesive (PSA) under a release liner. You peel the liner and press it onto the wall; no thinset, grout or paste. The main types of peel and stick tiles for backsplash in kitchen use differ a lot in thickness, look and heat tolerance.
| Type | Typical thickness | Look | Heat tolerance | Best for |
|---|---|---|---|---|
| 3D gel / epoxy-dome tiles | 1–3 mm | Glossy subway, mosaic, herringbone with raised "grout" | Moderate | Classic tile look on a budget |
| Flat PVC vinyl film or sheets | 0.1–0.3 mm | Marble, stone, solid color, printed tile | Low to moderate | Large areas, renters, low cost |
| Aluminum foil kitchen sticker | Thin foil + PVC/PET layers | Silver or gold metallic, embossed | Higher; heat- and oil-resistant grades | Behind cooktops, around range hoods |
| Peel and stick metal backsplash or peel and stick tin backsplash | 0.2–0.5 mm metal skin | Stainless, copper, pressed tin | High | Industrial and farmhouse kitchens |
| Real stone peel and stick backsplash or glass mosaic on adhesive mesh | 2–6 mm | Natural stone, glass tile | High | Premium look; heavier to handle |
Groutable peel and stick backsplash tiles also exist: thicker vinyl tiles you stick down and then grout for a more authentic joint. They take longer but look closest to ceramic.
Is peel and stick backsplash good? Pros and cons
Most peel and stick backsplash reviews come down to the same point: for most kitchens and laundry rooms it works, as long as the wall is smooth and the material suits the location. The main peel and stick backsplash pros and cons:
- Pros: fast, clean installation; no tile cutter or grout; usually removable; costs a fraction of ceramic tile plus labor; easy to wipe clean; ideal for rentals.
- Cons: lower heat tolerance than ceramic; thin film shows wall texture; cheap tiles can yellow or lift at the edges; textured paint and fresh paint reduce adhesion.
How long do peel and stick backsplash tiles last? Typically several years in a normal kitchen when applied to a clean, sound surface and kept away from direct flame. Lifting in the first weeks is almost always caused by grease, dust or a cold wall during installation, not by the product itself.
What tools do you need for a stick on backsplash?
- Degreaser or a 1:1 solution of isopropyl alcohol and water, and lint-free cloths
- Tape measure, spirit level and pencil
- Sharp utility knife with spare blades and a metal straightedge
- Plastic or felt-edged squeegee
- Hairdryer for corners and around outlets
- Backsplash trim strips or clear silicone for exposed edges
- About 10–15% extra material for pattern matching and cuts
How to install peel and stick backsplash step by step
Whether you are installing peel and stick tile backsplash in squares or applying a roll film, the method for how to apply backsplash is the same, and so is how to install stick on backsplash panels. These steps cover both tiles and roll film. Work at a room temperature of roughly 18–27 °C (65–80 °F); the adhesive grabs poorly on a cold wall.
- Turn off power and remove outlet covers. Switch off the circuit at the breaker and unscrew the cover plates so the film can run behind them.
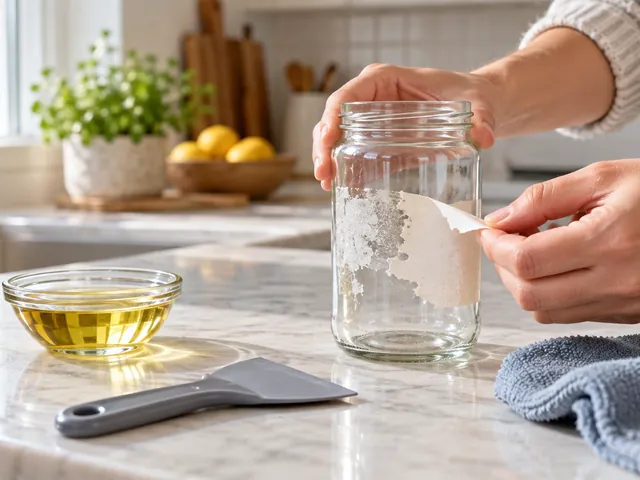
- Clean and degrease the wall. Kitchen walls carry an invisible film of cooking oil. Wash with degreaser, then wipe with the alcohol solution and let the wall dry completely.
- Check the surface. Fill holes, sand bumps and let fresh paint cure for at least 2–4 weeks. Glossy or satin paint gives better adhesion than flat paint.
- Mark a level line. Countertops are rarely level. Draw a level line one tile height above the lowest point of the counter and build from it, trimming the bottom row to fit.
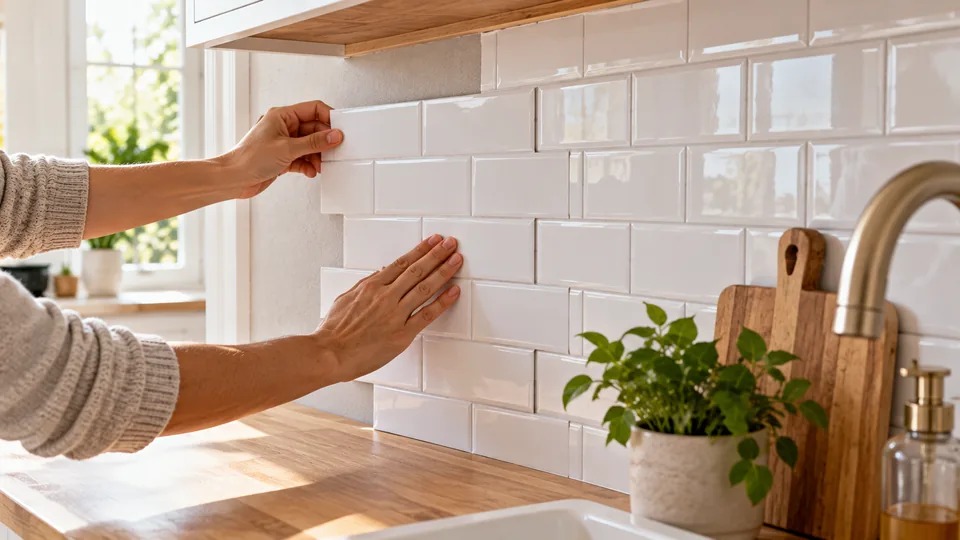
- Start at the bottom center. Peel a few centimeters of liner, align the tile to your line, and press from the center outward with the squeegee before removing the rest of the liner.
- Join the next tile. Overlap or interlock the edges as the product instructions specify, keeping the pattern aligned. Butt-joined film sheets should meet exactly without gaps.
- Cut around outlets and cabinets. Stick the tile over the opening, then cut an X and trim to the box edge with a sharp blade. Warm the film with a hairdryer at inside corners so it conforms.
- Finish the edges. Trim flush at cabinets and windows, add backsplash trim at exposed sides, and run a thin bead of clear silicone where the backsplash meets the countertop.
- Press everything again. Go over the whole surface firmly after an hour, refit the outlet covers and wait 24 hours before heavy cleaning.
For more on squeegee technique and avoiding bubbles, see how to install self-adhesive decorative film without bubbles.
Can you put peel and stick backsplash over tile?
Yes, you can put peel and stick tile over tile backsplash, but only if the existing tile is flat, firmly bonded and clean. Deep grout lines are the problem: thin film sinks into them and the lines show through, and the adhesive only touches the high points.
- Degrease the old tile thoroughly; glazed tile in kitchens carries years of oil.
- For thin film, skim the grout lines level with a lightweight filler or premixed joint compound and prime.
- Thicker 3D gel tiles can bridge grout lines under about 3 mm (1/8 in) without filling.
- Glossy tile may need a bonding primer for long-term adhesion.
Is peel and stick backsplash heat resistant behind a stove?
Most vinyl and gel tiles are not designed for direct heat. If you need a heat resistant backsplash for behind stove areas, a heat resistant peel and stick backsplash is possible, but follow three rules. First, check the product's stated temperature limit and its recommended distance from burners. Second, keep standard vinyl well away from gas flames; a common rule is at least 30 cm (12 in) between the burner edge and the film, or use a metal or tempered-glass panel directly behind a gas range. Third, choose a heat- and oil-resistant grade for the cooking zone.
Aluminum foil kitchen stickers are popular for this zone. Our thickened oil-proof aluminum foil kitchen sticker is an oil-proof, heat-resistant, anti-lampblack film in 0.61 m × 3 m rolls, and the gold aluminum foil kitchen sticker comes in 1.22 m × 50 m trade rolls. Even with these, confirm the permitted distance from heat sources for your cooktop.
How do you finish backsplash edges and trim?
Kitchen backsplash edges are where a peel-and-stick job looks either professional or homemade. Where the backsplash ends at a cabinet or wall, trim it flush. Where the edge is exposed, use backsplash trim strips: thin metal or PVC L-profiles or edge caps, also self-adhesive, in brushed nickel, black, white or gold. Backsplash trim tile (pencil or bullnose pieces) is another option for gel tiles.
Along the countertop, leave a 2–3 mm (about 1/8 in) gap and fill it with clear or color-matched silicone. This stops water wicking behind the film around the sink.
Which peel and stick backsplash styles and colors work best?
- White peel and stick backsplash: white subway tile is the safest choice for resale and small kitchens; peel and stick subway tile backsplash in a 7.5 × 15 cm (3 × 6 in) format reads as classic ceramic.
- Black, gray and grey: black peel and stick backsplash and charcoal tones suit modern kitchens; gray peel and stick backsplash hides splashes well. Grey peel and stick backsplash is the same thing in UK spelling. Black and white peel and stick backsplash in a checkerboard or a peel and stick backsplash herringbone layout adds pattern.
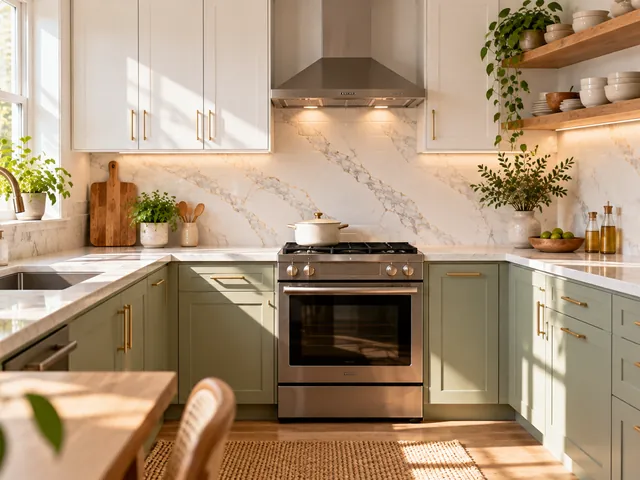
- Blue and green: blue peel and stick backsplash, light blue peel and stick backsplash and sage green peel and stick backsplash are popular for farmhouse and coastal styles.
- Warm neutrals: beige peel and stick backsplash and cream tones pair with wood cabinets; a red peel and stick backsplash works as an accent behind open shelving.
- Stone looks: peel and stick marble backsplash, peel and stick backsplash stone, stick on stone backsplash, peel and stick rock backsplash and rustic peel and stick backsplash in stacked-stone films give a natural look without the weight. Our marble waterproof kitchen wallpaper is a glossy PVC example.
- Glass and mosaic: peel and stick glass tile backsplash and peel and stick mosaic backsplash reflect light in darker kitchens.
For more design options, see our kitchen backsplash ideas. Always order peel and stick backsplash samples first: colors on screen vary, and a sample shows how the adhesive behaves on your actual wall.
Choosing the best peel and stick backsplash to stock
Which is the best peel and stick backsplash for kitchen retail, or the best stick on backsplash to list online? For housewares distributors and online sellers of kitchen peel and stick backsplash, it is the one with the lowest return rate, which means a reliable adhesive, a clear installation sheet and a range that covers the main styles: white subway, marble, a metallic foil for the stove zone and one or two trend colors. Our kitchen backsplash retail programme shows how a coordinated foil range is packed for shelf display.
Stock items ship from 1 roll with a 7–10 day lead time; customized patterns and packaging start at 100 rolls with 15–25 days production.
Next step
Tell us the backsplash style, roll or sheet size, packaging and quantity you need, and we will send a quotation within 24 hours. Free A4 samples are available to test adhesion and color on your own wall; contact us to request them.
Frequently Asked Questions
Is peel and stick backsplash good?
Peel and stick backsplash is a good choice for renters, budget makeovers and quick kitchen updates. It installs in an afternoon without grout and is usually removable. It is less heat-resistant and less durable than ceramic tile, so it works best on smooth, clean walls and away from direct flame behind gas burners.
Can you put peel and stick backsplash over existing tile?
Yes, if the existing tile is flat, firmly attached and thoroughly degreased. Thin vinyl film needs the grout lines skimmed level first, or the lines will show through and the adhesive will only touch the tile faces. Thicker 3D gel tiles can usually bridge shallow grout lines without any filling.
Can peel and stick backsplash go behind a stove?
It can if you choose a heat-resistant grade and respect the manufacturer's distance from burners. Standard vinyl and gel tiles should be kept well away from gas flames, often at least 30 cm (12 in). Aluminum foil or metal peel-and-stick backsplash handles cooking-zone heat better than plain vinyl.
Do peel and stick backsplash tiles last?
Good-quality peel and stick backsplash tiles typically last several years in a normal kitchen. Longevity depends mostly on preparation: a degreased, dry, smooth wall and installation at room temperature. Early lifting is usually caused by cooking grease, dust, textured or fresh paint, or a cold wall, rather than by the tiles themselves.
How do you finish the edges of a peel and stick backsplash?
Trim the backsplash flush where it meets cabinets or walls. On exposed sides, fit self-adhesive backsplash trim strips or edge caps in metal or PVC. Along the countertop, leave a gap of 2–3 mm and fill it with clear or color-matched silicone so water from the sink cannot run behind the film.
Will peel and stick backsplash damage the wall when removed?
On sound, fully cured painted drywall, most peel and stick backsplash removes cleanly if you warm it with a hairdryer and peel slowly at a low angle. Damage is more likely on fresh paint, flat or poorly bonded paint, or bare drywall paper. Any adhesive residue can be cleaned with a mild solvent.
How much peel and stick backsplash do I need?
Measure the width and height of each wall section, multiply to get the area, and subtract large openings such as windows. Then add 10–15% for pattern matching, trimming and mistakes. A typical 3 m kitchen run between counter and wall cabinets is roughly 1.5–2 square meters.