Key takeaways
- Transfer tape must grip vinyl harder than the release liner does, but less hard than the target surface does.
- Clear transfer tape makes alignment and layering easy, while paper transfer tape lies flatter and suits large signs and wet application.
- Low tack tape suits painted walls and removable vinyl, medium tack suits most permanent vinyl, and high tack suits glitter and textured vinyl.
- Peeling the liner away from the tape at a sharp 180° angle, rather than peeling the tape off the liner, releases letters most reliably.
- Vinyl decals typically need 24–72 hours to reach full adhesion, and longer when applied below about 15 °C (59 °F).
Vinyl transfer tape is a low-tack adhesive sheet that lifts cut and weeded vinyl lettering or decals off their backing liner and holds every piece in position while you apply it to the final surface. Clear plastic tape lets you see alignment; paper tape grips more evenly and lies flatter. Choose the tack level to match your vinyl.
Transfer tape, also called application tape, is the step that turns a weeded design into a finished sign or decal. Using the wrong tape is the most common reason letters refuse to release from the liner, or refuse to let go of the tape on the wall. This guide explains the types, tack levels and the exact method for using it.
What is transfer tape and why do you need it?
Self-adhesive cutting vinyl is a three-layer construction: the colored vinyl film, a pressure-sensitive adhesive (PSA) and a silicone-coated release liner. After a plotter cuts the design and you weed away the excess, the remaining letters sit on the liner as separate pieces. Transfer tape is laid over the top so all those pieces can be lifted together, with their spacing intact, and placed on glass, walls, signs, laptops, mugs or tumblers.
The tape works because of a tack balance. Its adhesive must be stronger than the bond between the vinyl and the liner, so the letters lift off, but weaker than the bond between the vinyl and the target surface, so the tape can be peeled away and the letters stay put. That is why tack level matters so much.
Heat transfer vinyl (HTV) does not need transfer tape: it is supplied on its own clear carrier sheet. Transfer tape is for adhesive (sign and decal) vinyl.
Clear vs paper transfer tape
| Feature | Clear transfer tape | Paper transfer tape |
|---|---|---|
| Material | Transparent PE, PP or PVC film, often with a printed grid | Masking-style paper with adhesive |
| Visibility | See-through, easy to align layers and position on glass | Opaque; position with tape and marks |
| Flatness | Can curl or stretch on long pieces | Lies flat and does not stretch |
| Wet application | Limited; water cannot pass through | Can be wetted and released with water |
| Best for | Small decals, layered designs, stickers, crafts | Large signs, long lettering, sign shop production |
| Typical cost | Higher per square meter | Lower per square meter |
Clear transfer tape for vinyl (transparent transfer tape) is the hobby and craft favorite because you can see exactly where each letter lands, which is essential for layering colors. Many clear tapes have a printed grid in 1 cm or 1 in squares to help keep lettering straight.
Paper transfer tape (masking paper transfer tape or masking transfer tape) is the traditional sign shop choice. It is stable over long runs of lettering, cheaper by the roll, and its adhesive releases when misted with water, which helps during wet application on glass.
Transfer tape tack levels: low, medium and high
Tack is how aggressively the tape's adhesive grabs. Manufacturers grade it in different ways, but the three broad bands are:
- Low tack transfer tape (also called light grip transfer tape): for thin calendered and cast vinyls with easy-release liners, for delicate surfaces such as painted walls, and for removable vinyl. Low tack transfer tape for vinyl reduces the risk of pulling paint or the vinyl itself off the wall.
- Medium tack transfer tape: the general-purpose choice for most permanent glossy and matte cutting vinyl, mugs, tumblers, signs and windows.
- High tack transfer tape: for glitter, textured, metallic and thick specialty vinyls, and for small text or fine detail that needs a firm grip to come off the liner.
If the tape will not lift the vinyl, the tack is too low; if it will not release the vinyl onto the surface, it is too high. A quick fix for too-high tack is to "detack" the tape by pressing it onto a clean cotton T-shirt or your forearm a few times before applying it.
What is the best transfer tape for vinyl?
The best transfer tape for vinyl, and the best transfer tape for decals in general, is the one matched to the vinyl type, the size of the design and the target surface. As a starting point:
| Project | Best transfer tape |
|---|---|
| Wall decals and lettering on painted walls | Low tack, clear or paper |
| Transfer tape for vinyl decals on glass and windows | Medium tack paper (allows wet application) or clear |
| Transfer tape for stickers and small vinyl stickers | Medium tack clear with grid |
| Mugs, tumblers and curved surfaces | Medium tack clear; cut slits at the edges to help it follow the curve |
| Glitter, holographic and textured vinyl | High tack (strong grip) |
| Large signs and transfer tape for vinyl lettering | Medium tack paper on a wide roll |
Width matters too. Rolls of 12 in (30 cm) suit desktop cutting machines; 24 inch transfer tape (61 cm) matches 0.61 m wide sign vinyl, and sign shops often run 48 in (122 cm) to match 1.22 m vinyl. A transfer tape roll of 50–100 m is far more economical than sheets once you cut regularly.
How to use transfer tape step by step
This is how to use vinyl transfer tape for a standard dry application of permanent adhesive vinyl:
- Cut and weed the design. Weed all the excess vinyl, including letter centers, while it is still on the liner.
- Cut the tape slightly larger. Allow about 1–2 cm (0.5 in) of tape beyond the design on every side.
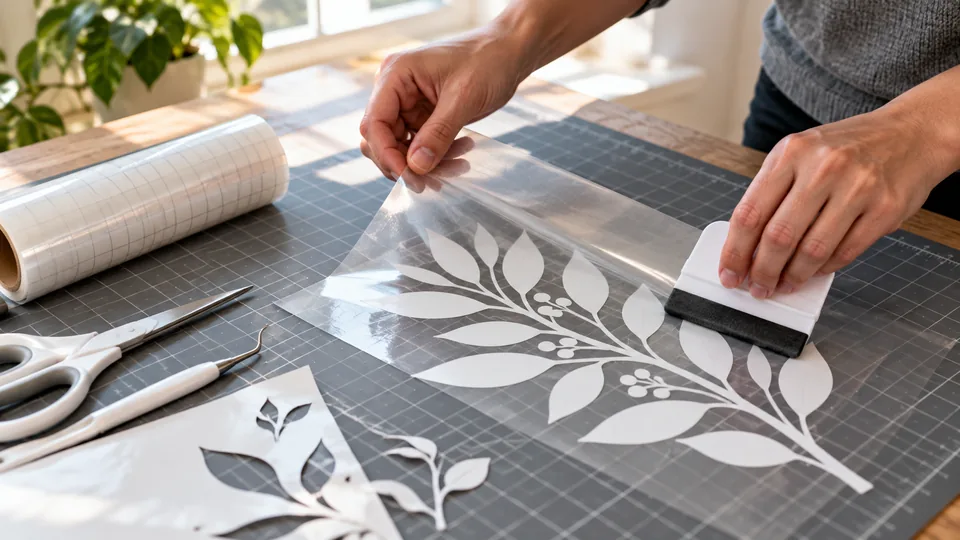
- Apply the tape. Peel the tape from its backing and lay it over the design starting from the center or one edge, avoiding wrinkles.
- Burnish firmly. Rub the tape with a squeegee or scraper from the center outward, front and then back of the liner. This is how to apply transfer tape to vinyl so every piece bonds to it.
- Peel the liner, not the tape. Turn the sheet face down and peel the liner back at a sharp 180° angle, flat against itself. If a letter stays on the liner, lay it back down, burnish again and retry.
- Prepare the surface. Clean it with isopropyl alcohol and let it dry. Mark the position with masking tape or a pencil.
- Apply the decal. For larger designs, use the hinge method: tape the design in place across the middle, peel the liner from one half, squeegee that half down, then repeat for the other half.
- Burnish and remove the tape. Squeegee over the tape firmly, then peel the tape back slowly at a sharp angle, close to the surface. Press down any letter that tries to lift.
Leave the vinyl to bond for 24–72 hours before washing or heavy handling, especially at temperatures below 15 °C (59 °F). Most vinyl adhesives are best applied between 10 and 30 °C (50–86 °F).
How to transfer vinyl with transfer tape using the wet method
For large decals on glass, lightly mist the glass with water and a drop of baby shampoo before applying. The water lets you slide the decal into position. Squeegee the water out from the center, wait 20–60 minutes (longer in cold weather), then remove the tape. Paper tape is easier to remove in wet application because water softens its adhesive. Do not use the wet method on walls or with removable vinyl.
Vinyl weeding tools you need with transfer tape
Before transfer tape comes weeding, and good vinyl weeding tools make it much faster:
- Weeding hook tool: a fine curved hook for lifting the excess vinyl and letter centers. The most-used weeding instrument.
- Weeding pick: a straight needle point for tiny pieces such as the dots on an "i" and the insides of small letters.
- Weeding tweezers: fine-point tweezers for gripping and pulling small scraps cleanly.
- Scraper or squeegee: for burnishing transfer tape and applying decals; a felt edge prevents scratches on gloss and metallic vinyl.
- Light pad: a backlight that shows cut lines clearly on dark or glitter vinyl.
The best vinyl weeding tools are the ones that feel comfortable in your hand over a long weeding session; a hook and a pick cover most jobs. Vinyl labeled "easy weed" has an adhesive and liner balance that lets the excess lift cleanly, which saves time with intricate designs. Our glossy and matte cutting vinyl uses a grid release liner that helps both weeding and alignment.
Transfer tape problems and how to fix them
| Problem | Likely cause | Fix |
|---|---|---|
| Vinyl stays on the liner | Tape tack too low, not burnished enough, or cut too shallow | Burnish both sides; use medium or high tack; check blade depth |
| Vinyl will not release from the tape | Tack too high or surface not clean | Use lower tack, detack the tape, clean surface with alcohol, peel tape at a sharper angle |
| Tape pulls paint off the wall | Tape or vinyl too aggressive, paint not cured | Low tack tape; wait 2–4 weeks after painting |
| Bubbles under the decal | Applied from the edges, not the center | Use the hinge method; prick bubbles with a pin and press |
| Letters shift or stretch | Clear tape stretched during application | Use paper tape for long lettering; handle gently |
For more on choosing the vinyl itself, read our cutting vinyl buyer's guide: permanent vs removable, glossy vs matte.
Transfer tape for sign shops and sticker makers
For production work, consistency matters more than any single product: pair one or two transfer tape grades with the vinyls you stock and record which combination you use for each job type. Sign shops typically keep a medium tack paper tape on 24 and 48 in rolls for lettering and a high tack clear tape for specialty films. Sticker makers often pre-mask vinyl transfer decals before shipping so customers receive them ready to apply; our guide to making vinyl stickers and decals covers that workflow.
We manufacture graphic and signage cutting vinyl in 80–200 micron gauges, 0.61 m and 1.22 m widths, permanent and removable adhesives, and glossy and matte finishes, and we produce custom die-cut stickers and logo decals. See how a sign shop organized its stock in our sign shop stock programme case study.
Next step
Tell us which vinyl colors, finishes and widths you cut most, and whether you need finished die-cut decals. We will send free A4 samples to test with your transfer tape and plotter, plus a quotation within 24 hours. Contact us here.
Frequently Asked Questions
What is transfer tape used for?
Transfer tape is used to move cut and weeded adhesive vinyl from its backing liner to the final surface in one piece. It holds every letter and shape in the correct position while you place the design on glass, walls, signs, mugs or tumblers, then peels away and leaves only the vinyl behind on the surface.
Can you use regular tape as vinyl transfer tape?
In a pinch, low-tack painter's masking tape laid in overlapping strips can transfer small vinyl decals. Regular clear packing tape or office tape is usually far too sticky and will not release the vinyl. For reliable results, especially with fine lettering, use purpose-made transfer tape with a tack level matched to the vinyl you are applying.
Which side of transfer tape goes on vinyl?
The sticky side of the transfer tape goes onto the face of the weeded vinyl, which is the colored side facing up on the liner. Peel the tape away from its own backing first, lay the adhesive side down over the design, burnish it firmly, then peel the vinyl's release liner away from the back.
Why won't my vinyl stick to the transfer tape?
Vinyl usually stays on the liner because the tape was not burnished firmly enough, the tape's tack is too low for that vinyl, or the cut was too shallow. Burnish both the front and the back, peel the liner away from the tape at a sharp angle, and switch to a medium or high tack tape for glitter or textured vinyl.
Is clear or paper transfer tape better?
Clear transfer tape is better for small decals, stickers and layered designs because you can see exactly where each piece lands. Paper transfer tape is better for large signs and long lettering because it lies flat, does not stretch and releases with water during wet application. Many sign shops keep both types in stock for different jobs.
Can you reuse transfer tape?
Yes, transfer tape can usually be reused several times for small vinyl decals, as long as it still holds the vinyl and is free of dust and lint. Store it back on its backing sheet between uses. Each reuse lowers the tack slightly, which can actually help with delicate surfaces, but replace it once it stops lifting vinyl cleanly.
What tools do you need to weed vinyl?
The essential vinyl weeding tools are a weeding hook for lifting excess vinyl, a fine pick for tiny pieces and letter centers, tweezers for gripping small scraps, and a squeegee for burnishing transfer tape. A light pad that shines through the vinyl makes cut lines easier to see on dark, glitter and metallic vinyl.