Key takeaways
- Clean the stone or glass with solvent and let it dry fully; oils, polishing compound and dust are the main causes of stencil edge lift under blast.
- Cut stencil film on a plotter with a 60-degree blade and increased force, weed the design, then apply with a squeegee from the centre outward and remove the PET backing last.
- Blast at 4–7 bar (60–100 psi) with 30–60 grit for granite monuments and 2–4 bar (30–60 psi) with 100–180 grit for glass, keeping the nozzle 100–200 mm from the surface and perpendicular to it.
- Blast in overlapping passes to a uniform depth, check with a depth gauge or fingernail test, then peel the stencil while the adhesive is still warm and clean residue with solvent.
- Use 0.9–1.1 mm rubber stencil for monuments, 0.5 mm PVC stencil for glass, and mask surrounding surfaces with PE protective film or masking tape.
To sandblast a monument or a piece of glass with stencil film, you clean the surface, cut and weed the stencil, apply it with a squeegee, mask the surrounding area, blast in overlapping passes to a uniform depth, and then peel the film and clean the residue. The process is the same for granite and glass; what changes is the stencil thickness, abrasive grit and pressure. This guide covers each step with the settings that monument and glass shops use as starting points.
Tools and materials
Before starting, gather the following:
- Sandblast stencil film: 0.9–1.1 mm natural rubber for granite monuments, 0.5 mm PVC for glass and shallow marble etching. Three-layer film with Mylar/PET backing is recommended for plotter-cut lettering. The full range is on the Sandblast Stencil Film page.
- Vinyl plotter with a 60-degree blade, or a stencil knife and straight edge for hand-cutting
- Weeding tool and tweezers
- Application squeegee with a felt edge
- Application tape (for transferring fine or multi-part designs)
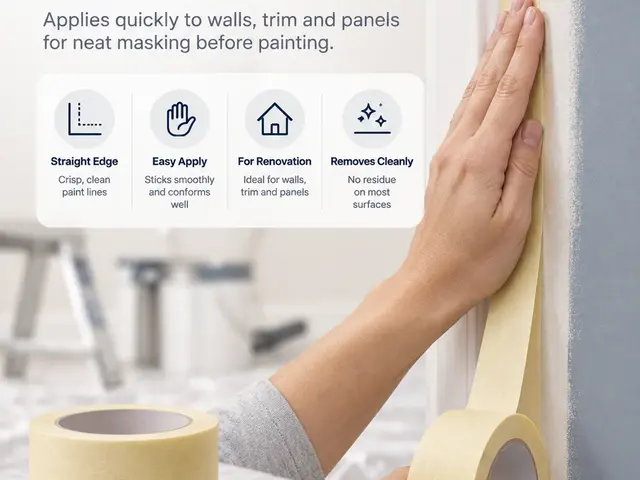
- PE surface protective film or masking tape jumbo rolls for surrounding areas
- Isopropyl alcohol or acetone, lint-free cloths
- Blast cabinet or pressure-pot blaster with a ceramic or boron carbide nozzle
- Abrasive: aluminium oxide, garnet or silicon carbide
- Depth gauge, PPE (respirator, gloves, eye protection, hearing protection)
Step 1: Prepare the surface
Adhesion is decided at this stage. Stone that has just come from polishing carries residue from the polishing compound; glass carries fingerprints and packing dust. Both cause the stencil to lift under blast.
- Wipe the whole area with isopropyl alcohol or acetone on a lint-free cloth.
- Wipe again with a dry cloth and let the surface air-dry for at least five minutes. Solvent trapped under the film weakens the bond.
- Check the temperature. Stencil adhesive bonds best between 15 °C and 30 °C. In cold weather, warm the stone with a heat gun before application and store the film indoors.
- For outdoor monument work, shield the surface from dust and rain until the stencil is on.
Step 2: Cut and weed the stencil
Plotter cutting
- Load the roll (0.305 m or 0.61 m wide) and set the blade to a 60-degree angle.
- Increase cutting force well above vinyl settings. As a starting point, 0.5 mm PVC needs roughly two to three times the force used for sign vinyl; 1.0–1.1 mm rubber may need the plotter’s maximum force and a second pass on some machines.
- Cut a small test shape first and confirm the blade goes through the film and adhesive but not through the PET backing.
- Mirror-image is not required; the stencil is applied face-up.
- Reduce speed to about half of vinyl speed to keep corners clean.
Hand cutting
For simple borders, large letters and one-off shapes, place the film on a cutting mat and cut with a stencil knife and straight edge. Keep the blade vertical so the edge of the stencil is square; a bevelled edge lets abrasive undercut the film.
Weeding
Remove the film from areas that will be blasted. Start with the largest areas, then centres of letters. Keep the weeded letters or the surrounding film (depending on whether the design is incised or raised) on the backing. Fine detail on PVC weeds with tweezers; large rubber areas weed as continuous strips.
Step 3: Apply the stencil
- Mark the centre line and baseline on the stone or glass with a grease pencil or masking tape.
- For multi-part or fine designs, apply application tape over the weeded stencil so all pieces move together.
- Position the stencil, then hinge it with a strip of masking tape along the top edge.
- Peel the release liner back partway, and squeegee from the centre outward with firm, overlapping strokes. Work down the design, peeling the liner as you go. This prevents air bubbles and keeps registration.
- Remove the application tape at a low angle.
- Remove the PET backing on three-layer film after the stencil is fully bonded.
- Squeegee the entire stencil again, paying attention to every cut edge. Run a fingernail along small letters to confirm the edges are down.
- Wait 15–30 minutes before blasting so the adhesive can build its bond.
Step 4: Mask the surrounding surface
Overspray from a blast nozzle travels further than most people expect. Cover polished areas, edges and adjacent panels with PE protective film or masking tape, and overlap the mask onto the stencil border by at least 20 mm. On glass, mask the reverse face too; rebound abrasive can frost it.
Step 5: Blast
Settings differ significantly between stone and glass.
| Parameter | Granite monument | Marble / limestone | Glass |
|---|---|---|---|
| Stencil film | 0.9–1.1 mm rubber | 0.5–0.9 mm rubber or PVC | 0.5 mm PVC |
| Abrasive | Aluminium oxide or garnet | Aluminium oxide | Aluminium oxide |
| Grit | 30–60 | 60–100 | 100–180 |
| Pressure | 4–7 bar (60–100 psi) | 3–4 bar (45–60 psi) | 2–4 bar (30–60 psi) |
| Nozzle distance | 100–200 mm (4–8 in) | 150–250 mm | 150–300 mm |
| Typical depth | 3–10 mm | 1–4 mm | Surface frost to 1 mm |
These are industry-typical starting points; adjust for your compressor, nozzle size and abrasive.
Technique:
- Hold the nozzle perpendicular to the surface. Blasting at an angle toward a stencil edge drives abrasive under the film.
- Move in steady, overlapping passes across the whole design rather than concentrating on one letter. Uneven depth shows clearly on polished granite.
- Check depth regularly with a gauge or a fingernail. For raised lettering, blast the background evenly and stop as soon as the required depth is uniform.
- For V-cut letters, blast the centre line first and then work the sides at a slight angle, keeping the nozzle moving.
- On glass, use light passes. The frost develops quickly and over-blasting creates a rough, grey surface instead of a smooth satin finish.
- Watch the stencil. If the surface of the rubber begins to look chalky and thin, stop and finish that area with reduced pressure.
Step 6: Remove the stencil and clean up
- Blow off loose abrasive with compressed air.
- While the surface is still warm, lift a corner and peel the stencil back on itself at a low angle. Rubber comes off in large pieces; PVC on glass peels cleanly.
- Remove masking film and tape.
- Clean adhesive residue with a solvent wipe and a soft cloth. Do not use abrasive pads on polished stone or glass.
- Inspect the cut edges. On monuments, blasted lettering is usually finished with lithochrome paint or gilding; apply only after the surface is fully clean and dry.
Common mistakes
- Blasting too soon after application, before the adhesive has bonded.
- Using a thin PVC stencil for deep granite work, so the film wears through before depth is reached. See the rubber vs PVC comparison for choosing thickness.
- Holding the nozzle too close, which heats the stencil and lifts small letters.
- Skipping masking on the reverse of glass panels.
- Storing rubber film in a hot workshop; the adhesive hardens and edge adhesion drops.
- Reusing stencil film. It is single-use by design.
Shanghai Mars Industrial produces stencil film under ISO 9001 and ISO 14001 with SGS test reports available, and shops that have moved to plotter-cut lettering can see examples of monument and glass work on the projects page.
Next step
If you are setting up a new blast line or switching stencil suppliers, request free A4 samples of 0.5 mm PVC and 1.0 mm rubber film through the contact page, run them through your plotter and blast cabinet, and then ask for a quotation in your preferred width and Incoterm. Stock rolls ship in 7–10 days.
Frequently Asked Questions
How do I stop sandblast stencil from lifting at the edges?
Clean the surface with isopropyl alcohol or acetone, let it dry, apply the stencil with firm squeegee pressure, and allow 15–30 minutes for the adhesive to bond before blasting. Keep the nozzle perpendicular and avoid blasting at a low angle toward a stencil edge.
What abrasive and pressure should I use for granite headstones?
Industry-typical settings are aluminium oxide or garnet at 30–60 grit and 4–7 bar (60–100 psi), with the nozzle 100–200 mm from the stone. Start at the lower pressure and increase until the cut rate is comfortable without damaging the stencil.
What pressure should I use for sandblasting glass?
Glass etches quickly, so use 100–180 grit aluminium oxide at 2–4 bar (30–60 psi). A 0.5 mm PVC stencil film is sufficient at these settings, and overlapping light passes give a more even frost than a single heavy pass.
How deep should monument lettering be blasted?
Standard incised lettering on granite is typically 3–6 mm deep; deep V-cut and raised letters may go to 10 mm. Stop blasting once the bottom of the cut is uniform and the required depth is reached to avoid undercutting the stencil.
How do I remove sandblast stencil film after blasting?
Peel the stencil back on itself at a low angle while the surface is still warm from blasting. Rubber film comes off in large pieces; any adhesive residue cleans with a solvent wipe and a soft cloth.
Can I reuse a sandblast stencil?
No. Self-adhesive stencil film is single-use. The abrasive wears the surface and the adhesive does not re-bond reliably after removal.